The competitive business landscape has led to businesses of all sizes striving to establish and maintain effective communication channels with their existing and potential customers. However, only a comprehensive analysis of data over such channels, including Mailchimp, helps derive valuable insights to make informed decisions. By moving the data from Mailchimp to a centralized data warehouse like Snowflake, you can enhance your company’s marketing efforts.
Let’s look at an overview of both platforms before we explore the different methods you can use to move data from Mailchimp to Snowflake.
An Overview of Mailchimp
Mailchimp is an email marketing and automation platform that enables you to create, manage, and analyze email campaigns. It offers a range of tools and features that help you engage with your audience effectively.
Here are the key features of Mailchimp:
- Analytics and Reporting: Mailchimp offers analytics and reporting capabilities to help you track the performance of your email campaigns. It allows you to monitor open rates, click rates, unsubscribes, and other critical metrics. With these sophisticated insights, you can make data-driven decisions, understand campaign effectiveness, and refine your strategies.
- A/B Testing: Mailchimp’s A/B testing allows you to test different versions of an email to see how small changes can impact the results. You can try changes in subject lines, email content, images, layouts, and send times to check what works best for clicks, opens, and revenue.
- Integration with Third-Party Apps: Mailchimp integrates with third-party tools like WordPress, Zendesk, Shopify, and social media platforms. This allows connecting data from frequently used platforms to send more relevant, targeted messages to customers.
- Automation: You can use Mailchimp’s automation features to set up automated emails or workflows triggered by certain actions or events. Some uses include updating customers on their account activity or purchases and retargeting ads to recapture the attention of people who visited your site.
An Overview of Snowflake
Snowflake is a fully-managed, cloud-based data warehouse that is built on top of AWS, Azure, and Google Cloud infrastructure.
The architecture of Snowflake decouples storage and computing, allowing you to scale independently. This lets you scale up or down as needed and pay only for the resources you use. While computation is billed on a per-second basis, storage is billed in terabytes stored per month.
Here are some other essential features of Snowflake, making it a popular choice for data warehousing:
- Cloning Functionality: You can use Snowflake’s Zero Copy Cloning feature to quickly create a copy of any table, schema, or entire database in real time. Instead of deep copies, it stores pointers to the original data, helping save a lot of space when compared to copy functions of other data warehouses.
- Multi-Cloud Support: Snowflake offers support for public cloud providers like Microsoft Azure, Amazon Web Services (AWS), and Google Cloud Platform (GCP). This gives you the flexibility to choose the cloud provider of your choice or opt for a multi-cloud strategy.
- Supports Semi-structured Data: Snowflake has built-in support for importing or exporting data in semi-structured formats like JSON, Avro, ORC, XML, and Parquet. It also provides native data types like VARIANT, OBJECT, and ARRAY to store semi-structured data.
Mailchimp to Snowflake Integration Methods
You can use one of the following methods to move data from Mailchimp to Snowflake.
- Method #1: Using manual import and export
- Method #2: Using APIs
- Method #3: Using SaaS alternatives like Estuary
Method #1: Using Manual Import and Export to Move Data From Mailchimp to Snowflake
Mailchimp allows the export and backup of account data for safeguarding your data. You can use this feature to store account information outside of your Mailchimp account and also re-import your previously exported data. Here’s a list of what you can export from your account:
- Audiences
- Reports
- Templates
- Campaigns
- Content studio files
- Events
A drawback of this method is that you can only do one account export in 24 hours. And the export process may take some time, especially for a large amount of data. Once the data export is ready, you’ll receive an email and a ZIP file of all your requested data. The data can be in various formats like CSV, TXT, or HTML.
After exporting the data, you may have to do some preprocessing to meet Snowflake’s data schema requirements.
The next step is to load the data into Snowflake. Some of the data-loading methods include using SQL commands, Snowpipe, Snowflake’s web interface, or third-party ETL tools.
Method #2: Using APIs to Move Mailchimp Data to Snowflake
Mailchimp has a rich REST API that you can use to extract your account data. The API exposes a large number of endpoints for resources like Automations, Campaigns, Lists, Reports, and Templates, among others, for you to interact. Use tools like CURL or Postman, or HTTP clients such as Apache HTTPClient for Java, Python HTTP-client, etc.
When you use the Mailchimp API to extract data, a user might appear in more than one list, so you must reduplicate the results accordingly. After extracting the data, it must be processed to align with the Snowflake data model before loading it. Data in Snowflake is organized into tables with a well-defined set of columns, each with a specific data type. For more information on the data types that Snowflake supports, read the Snowflake data types documentation. Before you load your Mailchimp data into Snowflake, there are some data loading considerations you must take into account.
To load the data into Snowflake, you can use SnowSQL, Snowflake’s CLI, to execute SQL queries. Alternatively, you can also use Snowpipe REST API to load the transformed data into Snowflake.
Method #3: Using SaaS Tools Like Estuary Flow to Move Data From Mailchimp to Snowflake
For an easier and more time-efficient integration between the two platforms, consider using third-party ETL tools like Estuary.
Estuary Flow provides pre-built connectors, which simplifies the process of setting up data integration pipelines. An added advantage of Flow is that it’s a real-time data operations platform. You can use the variety of connectors to receive real-time data from a range of sources and then materialize the data in different formats.
Here are the steps you can follow for Mailchimp to Snowflake integration using Estuary Flow.
Step 1: Register or Log In
You will need an Estuary account to get started. Register for a free account if you don’t already have one, and then sign in.
Step 2: Set up the Data Source
Prerequisite: A Mailchimp account
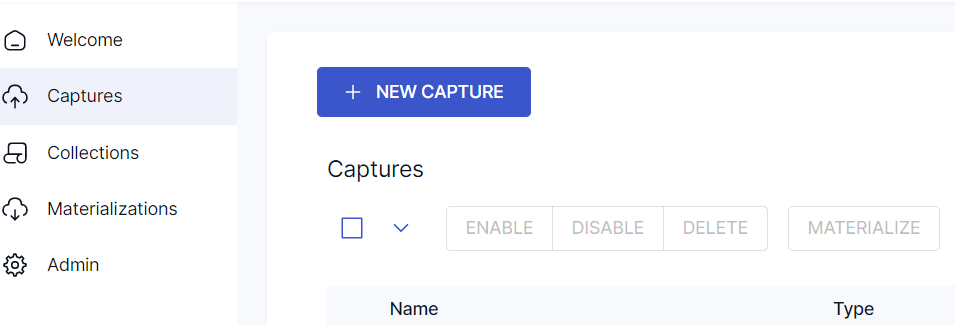
Upon logging in, you will be redirected to the Estuary dashboard with an easy-to-use interface. Now, you must set up the source end of the data pipeline, which is Mailchimp. On the left-side pane of the dashboard, click on Captures. Then, click on the NEW CAPTURE button.
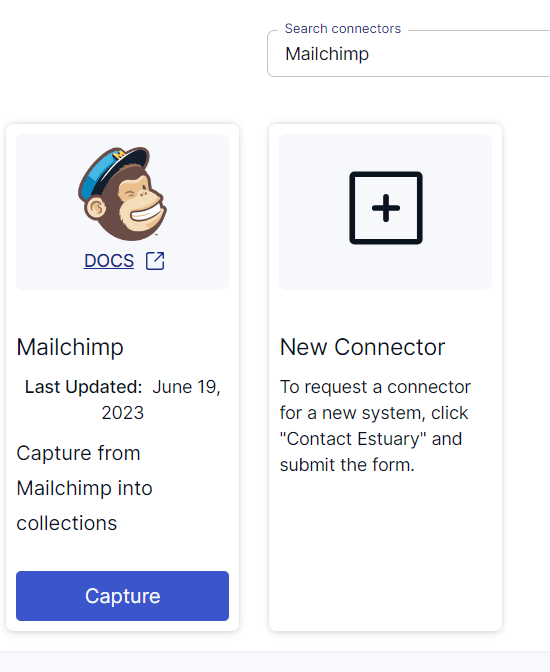
In the Search connectors box, search for Mailchimp. The connector will appear in the search results, following which you can click on the connector’s Capture button.
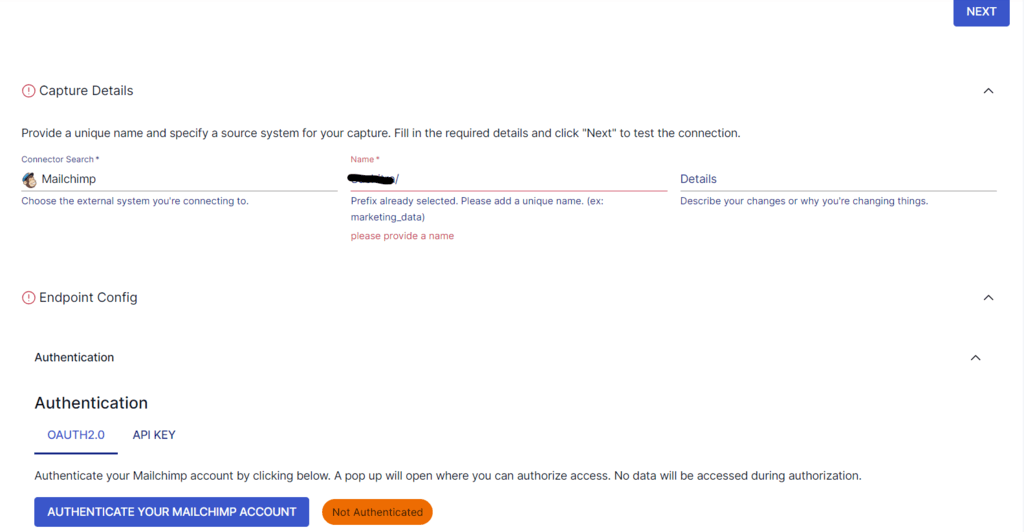
Once you’re on the Mailchimp connector page, provide a Name for the connector, and authenticate your Mailchimp account using OAuth2.0 or API Key. After completing the authentication, click on the Next button, then click on Save and Publish.
This connector will capture data from your Mailchimp account. The data sources that it supports and maps to a Flow collection include campaigns, lists, and email activity.
Step 3: Set up the Data Destination
Ensure you have a user role with appropriate permissions to your Snowflake database, schema, and warehouse for connecting to Flow. You can run this quick script to accomplish this.
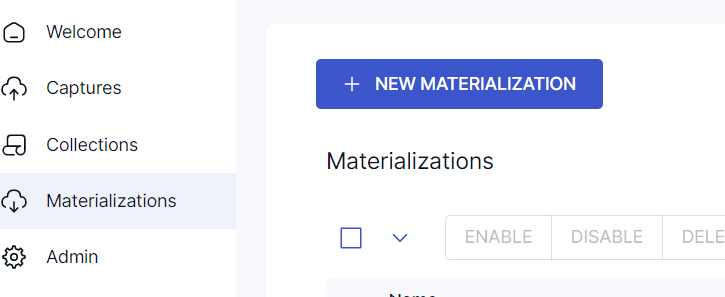
The next step is to set up the destination end of the pipeline, which is Snowflake. You can do this by clicking on Materialize Connections in the pop-up following the successful capture from your Mailchimp account. Alternatively, you can navigate to the Estuary dashboard and click on Materializations, then click on the NEW MATERIALIZATION button.
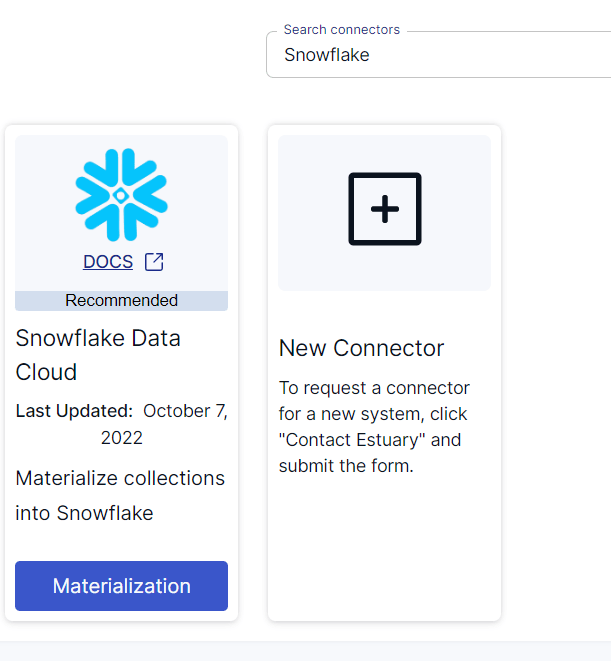
Either search for Snowflake in the Search connectors box or scroll down and search for it. Then, click on the Materialization button of the Snowflake Data Cloud connector.
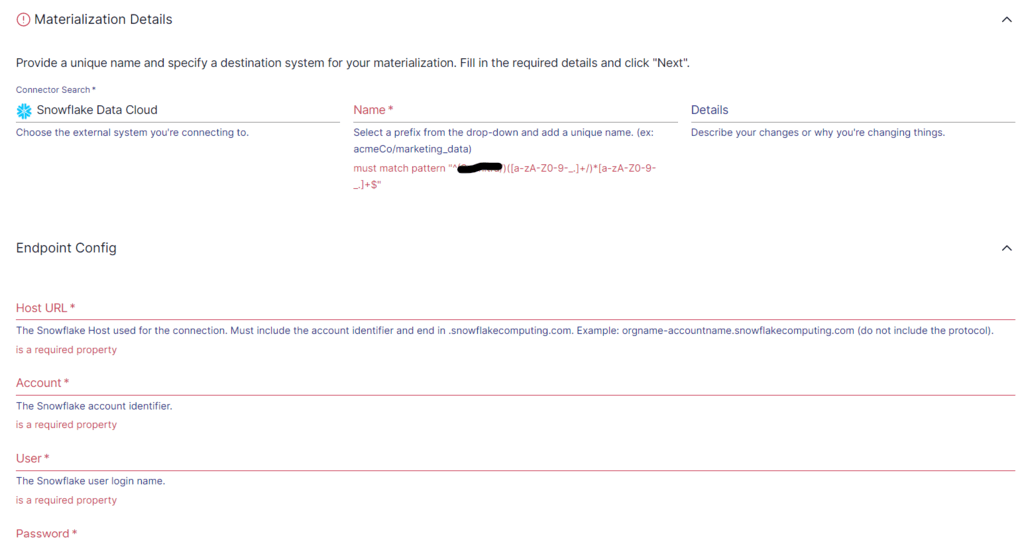
On the Snowflake connector page, provide a unique Name for the connector. Enter the details for the required property fields, like Host URL, User, Password, Account, and Database, then click on Next. If the data captured from Mailchimp wasn’t filled in automatically, you can add the data from the Source Collections section. Then, click Save and Publish.
The Snowflake connector will materialize the Flow collections into tables within a Snowflake database.
For more detailed information, refer to the Estuary documentation on
Conclusion
Among the three methods to move data from Mailchimp to Snowflake, the one that requires the least manual effort and time is Estuary Flow. The manual export and import method can be time-consuming and error-prone, especially for large volumes of data or frequent updates. Unlike Estuary Flow, the manual method is unsuitable for real-time data transfer.
Using APIs involves building a custom script. Apart from requiring development skills for the script, it also requires maintenance for any API updates.
But, by using Estuary’s streaming capabilities, you can successfully execute real-time Mailchimp to Snowflake integration with minimal effort. This will enable you to gain real-time insights for efficient data-driven decision-making.
Estuary Flow has a range of connectors that allow you to integrate any two platforms in only a few minutes. Register for a free account to start building data pipelines. Your first pipeline is free!
Here are some other integrations that use Snowflake as the destination:

Author
Popular Articles


