In the evolving environment of cloud-based data management, the migration of data from Amazon RDS to Redshift is a strategic solution that provides a variety of benefits. Amazon RDS, a fully managed relational database service, has long been a top choice for enterprises looking for scalability and ease of maintenance.
However, when analytical demands increase, shifting to Amazon Redshift, a sophisticated data warehouse system, becomes a very appealing option. This guide provides a step-by-step guide to loading data from Amazon RDS to Redshift and how to achieve efficient data migration using the most reliable methods available.
Amazon RDS Overview
Amazon RDS (Relational Database Service) is a fully managed relational database service offered by AWS. It supports a number of database engines, namely Amazon Aurora PostgreSQL-Compatible Edition, RDS for MariaDB, and RDS for Db2, providing a scalable and cost-effective solution for cloud applications. Thanks to this feature, the code, applications, and tools you already use with your databases can be used for Amazon RDS. Additionally, it automates database management processes, including provisioning, patching, backup, recovery, failure detection, and repair.
Here are some key features of Amazon RDS.
- Scalability: Amazon RDS supports scalability through vertical scaling (instance class adjustments), horizontal scaling (read replicas), and storage scaling. Specifics may vary based on the chosen database engine. This adaptability enables the efficient handling of shifting workloads.
- Automated Backup and Restore: Amazon RDS performs frequent database backups, and you can restore data at any time within the retention period. Automated backups save data and make recovery easier.
- High Availability with Multiple-AZ Deployments: Multi-AZ deployments replicate databases across multiple availability zones, ensuring high availability and fault tolerance. If an issue arises in one availability zone, Amazon RDS can instantly switch to a standby replica in another zone.
- Security Features: Amazon RDS has strong security measures, including encryption at rest and in transit. Amazon Virtual Private Cloud (Amazon VPC) is used to isolate networks, and access control is maintained via AWS Identity and Access Management (IAM) roles.
Amazon Redshift Overview
AWS offers a data warehousing solution called Redshift. It is intended to handle large-scale data analysis and reporting jobs. This is done by utilizing a columnar storage format and parallel processing features. The notable features of Redshift allow you to ingest, convert, and analyze massive amounts of data effectively and make informed decisions.
Let’s look into some key features of Redshift that make it a popular warehouse choice.
- Columnar Storage: Redshift employs a columnar storage method, which stores data in a table column-wise rather than row-wise. This enables better compression, faster query performance, and more economical use of disc space.
- Massive Parallel Processing (MPP): Redshift employs a distributed architecture that parallelizes and distributes queries over numerous nodes in a cluster. This supports high-performance data processing and query execution across big datasets.
- Scalability and Elasticity: Redshift scales effortlessly from gigabytes to petabytes of data. It enables easy scalability by adding or deleting nodes from a Redshift cluster, resulting in elastic storage and computation capacity.
- Advanced Compression: Redshift uses a variety of compression techniques, including run-length encoding and delta encoding, to reduce data size and minimize I/O operations, yielding improved query performance.
How to Load Data From Amazon RDS to Amazon Redshift
Here are the different ways to load data from Amazon RDS to Redshift.
- The Manual Approach: Loading data from Amazon RDS to Amazon Redshift
- The Automated Method: Loading data from Amazon RDS to Redshift using Estuary Flow
The Manual Approach: Loading Data From Amazon RDS to Amazon Redshift
To manually import data from Amazon RDS to Redshift using a coding approach, follow the steps below.
Step 1: Create an S3 bucket
Amazon Web Services (AWS) provides S3 buckets, which are cloud storage containers. It lets you store and access any quantity of data anytime and from anywhere on the web.
- Create an Amazon S3 bucket to temporarily store the data throughout the migration process.
- Ensure you have the necessary rights to access the bucket.
Step 2: Export data from Amazon RDS to S3
To export data from RDS to your S3 bucket, run the following AWS CLI command:
plaintextaws rds-data execute-statement
--database <database-name>
--resource-arn <db-cluster-arn>
--Secret-arn <secret-arn>
--sql “SELECT * FROM <table-name>”
--Include-result-metadata
--Output text > s3://<bucket-name>/data.txt
Make sure to replace
- <database-name> with the name of your Amazon RDS database.
- <db-cluster-arn> with the ARN of your RDS cluster.
- <secret-arn> with the ARN of the secret containing the credentials.
- <table-name> with the name of the table from which you want to export data.
- <bucket-name> with the name of your S3 bucket.
Step 3: Create a Redshift Cluster
Create a Redshift cluster in Amazon Redshift and note the endpoint, database, and database credentials.
Step 4: Create a Table in Redshift
In your Redshift cluster, create a table that has the same structure as the data you exported from RDS. Ensure that the column names, data types, and constraints all match.
Step 5: Copy Data from S3 to Redshift
To copy data from the S3 bucket to Redshift, run the following AWS CLI Command:
plaintextaws redshift copy from ‘s3://<bucket-name>/data.txt’
Credentials ‘aws_iam_role=<iam-role-arn>’
delimiter ‘<delimiter>’
region ‘<aws-region>’
CSV IGNOREHEADER 1 manifest;
Replace:
- <bucket-name> with the name of your S3 bucket.
- <iam-role-arn> with the ARN of the IAM role that has privileges to read the file in S3.
- <delimiter> with the delimiter used in your data file.
- <aws-region> with the AWS region in which the data is stored.
Step 6: Verify Data Transfer
You may confirm that the data transfer was successful by querying the newly generated table in Redshift and comparing it to your RDS table.
Here are some limitations of loading data manually.
- Data Transformation: When loading data manually, you must do data transformation tasks yourself. This includes dealing with data type conversions, formatting, and any changes required to match the Redshift schema. It takes extra work to ensure data consistency with the target database.
- Performance: Manually loading huge volumes of data can take time and impact performance. It may be inefficient for handling frequent or large-scale data transfers, particularly if the procedure must be repeated on a regular basis.
- Error Handling: Manual loading increases the likelihood of human mistakes during data transfer. If mistakes arise, you must identify, troubleshoot, and correct them manually. This can be difficult, especially with complicated data sets or when there are unique limits imposed by Redshift.
- Maintenance and Monitoring: This method may necessitate additional maintenance work, such as monitoring the data transfer process, resolving problems, and maintaining the codebase used for the transfer. This can increase the workload for the development team.
The Automated Method: Loading Data From Amazon RDS to Redshift Using Estuary Flow
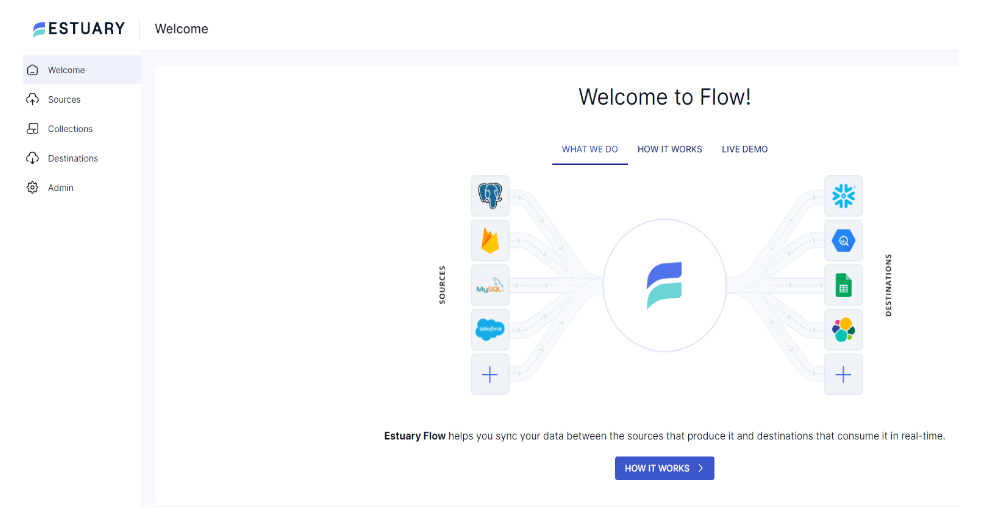
Estuary Flow is a user-friendly ETL solution that enables real-time data transfer even for someone without in-depth technical expertise. You can follow this step-by-step guide for loading data from Amazon RDS to Redshift using Flow.
Step 1: Configure Amazon RDS as the Source
- Visit the Estuary website and log in to your account. If you don’t already have an account, create a new one.
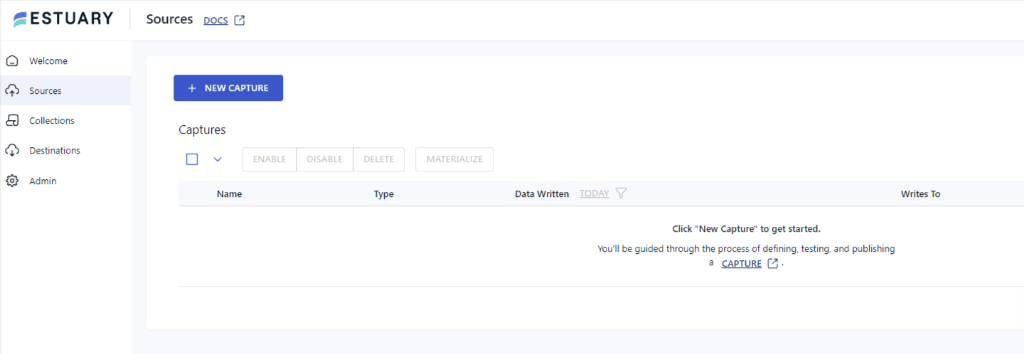
- On the main dashboard, select Sources from the options on the left-side pane.
- Click the + NEW CAPTURE button in the upper left corner of the Sources page.
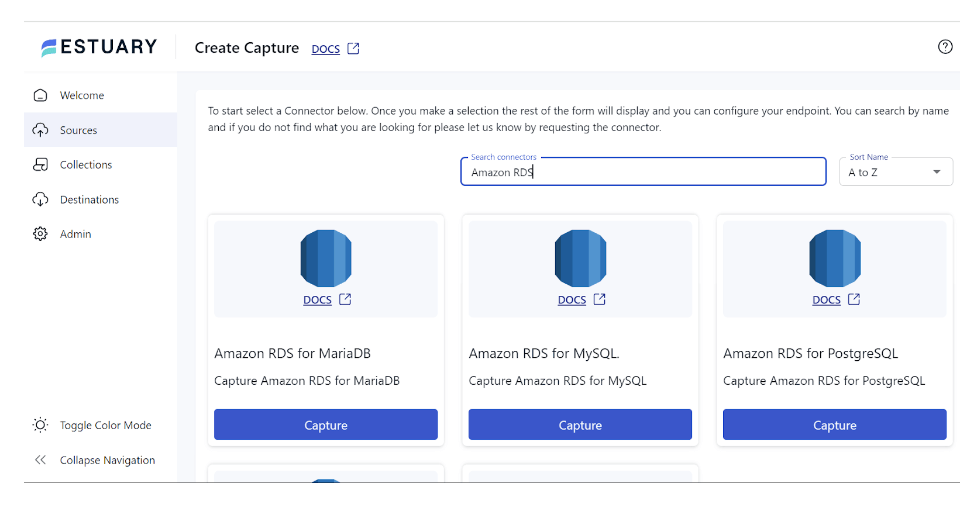
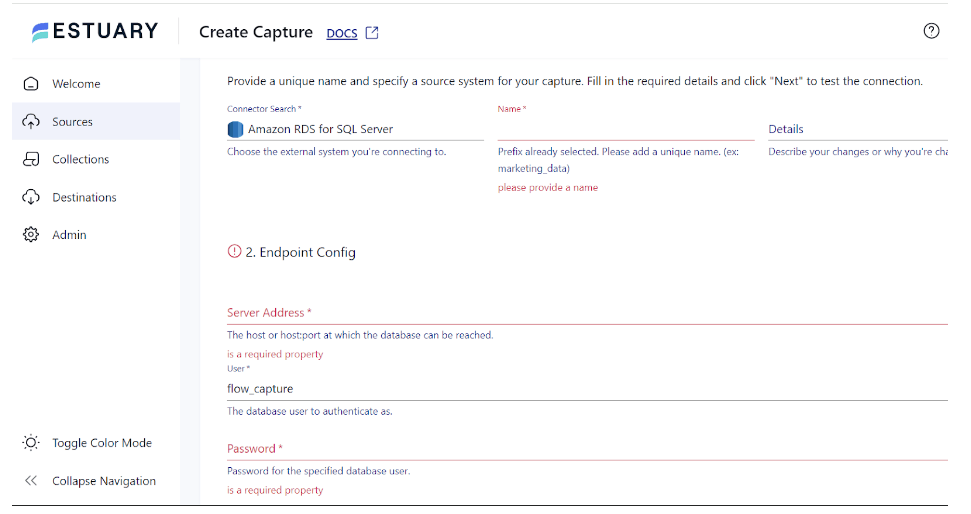
- Use the Search connectors box to locate the Amazon RDS connector for PostgreSQL. When you find the connector in the search results, click the Capture button.
Apart from this connector, there are other Amazon RDS connectors available. You can select RDS MariaDB to Redshift, RDS MySQL to Redshift, RDS Postgres to Redshift, or RDS SQL Server to Redshift. - This will redirect you to the Amazon RDS connector page. On the Create Capture page, enter mandatory fields, including Name, Address, User, and Password.
- Click NEXT > SAVE AND PUBLISH. This will capture data from PostgreSQL into Flow collections.
Similar steps can be performed for other Amazon RDS connectors for MariaDB, MySQL, SQL Server, etc. All you need to do is select the Amazon RDS connector of your choice and configure the connector as the source end of the pipeline.
Step 2: Configure Redshift as a Destination
- Upon the completion of a successful capture, you will see a pop-up window with the details of the capture. Click on MATERIALIZE COLLECTIONS in this pop-up to proceed with setting up the destination end of the pipeline.
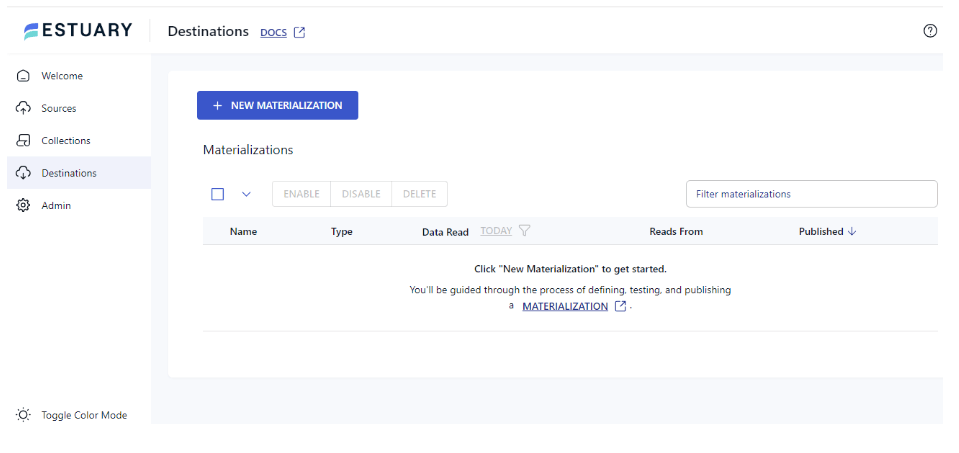
Alternatively, navigate back to the main dashboard of Estuary Flow and click on Destinations.
- On the Destinations page, click the + NEW MATERIALIZATION button.
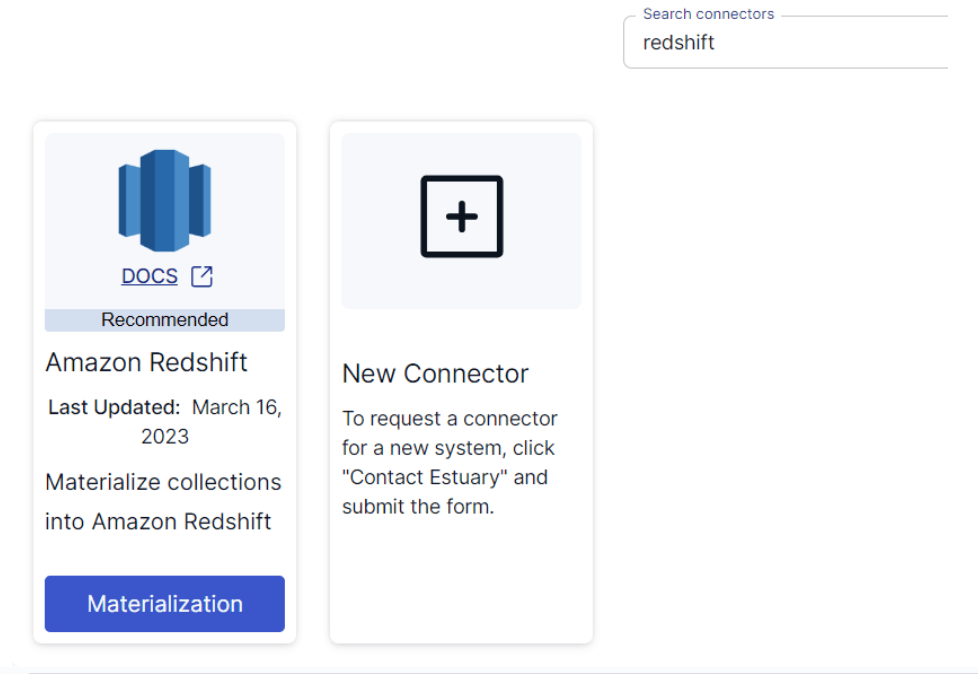
- Type Redshift in the Search connectors field. When you see the connector in the search results, click the Materialization button.
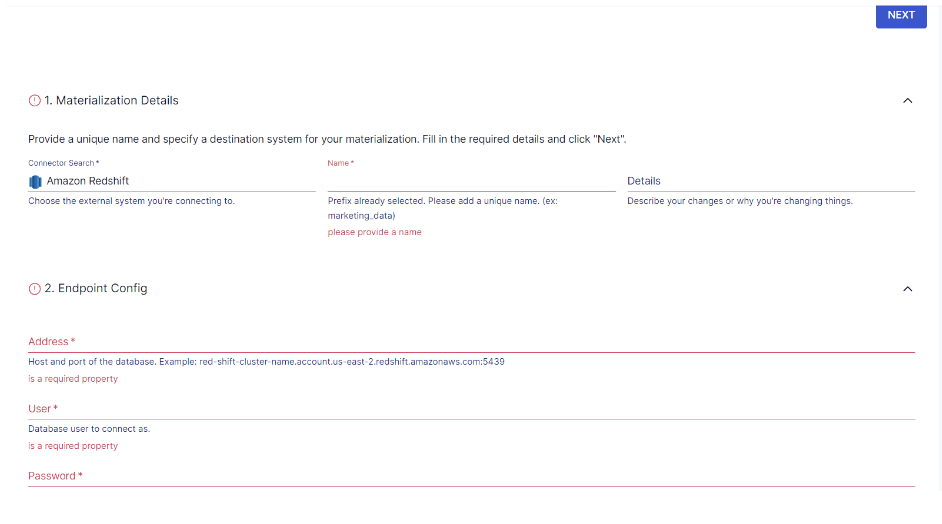
- Fill in the essential information on the Create Materialization page, which includes Name, Address, and Database.
- You may choose a capture to link to your materialization by clicking LINK CAPTURE in the Source Collections section. Your materialization will automatically include any collections you add to the capture.
As an alternative, you may choose which Flow collections you wish to include in the materialization by clicking the + icon in the COLLECTIONS section. - Then click NEXT > SAVE AND PUBLISH.
Data from the Flow collections will be transferred to Redshift. Estuary Flow makes it easy to load data from Amazon RDS to Redshift in just two steps.
For a better understanding of how Flow works, read the documentation on:
Benefits of Using Estuary Flow
- Real-time Processing: One of Estuary Flow’s key assets is its ability to process data in real-time. This is useful if you need fast insights from streaming data.
- Easy to Set Up: Estuary’s intuitive interface and easily available connectors make it simple to set up and manage streaming data pipelines.
- Scalability: Estuary Flow pipelines can scale automatically up to 7GB/s to accommodate growing data volumes. This promotes data integrity and consistency in performance.
Conclusion
Loading data from Amazon RDS to Redshift provides the opportunity to harness the potential of cloud-based data warehousing and analytics. With the right approach and understanding, you can access useful insights and make informed decisions, resulting in improved business outcomes.
Using the manual method to load data from Amazon RDS to Redshift has drawbacks, such as the possibility of data loss. Latency issues may also arise because of buffer size or interval limits, which are incompatible with real-time data processing.
Modern data integration platforms like Estuary Flow support real-time data processing, superior scalability, and simplified data setup. A vast choice of readily available connectors serve to streamline your workflows and optimize your data management processes.
Sign in or create an Estuary account to get started today!
FAQs
How to transfer data from RDS to Redshift?
To transfer data from RDS to Redshift, you can export data from Amazon RDS to an S3 bucket and then copy the data to Redshift. Alternatively, you can use an efficient ETL tool like Estuary Flow to automate the process.
Is Amazon RDS the same as Redshift?
No, Amazon RDS and Redshift are not the same, even though they have similarities. Amazon RDS (Relational Database Service) is a managed service that simplifies the setup, operation, and scaling of database servers in the cloud. Redshift is a managed data warehousing service optimized for OLAP and large-scale reporting and analytics workloads.
How do I migrate RDS to another region?
To migrate RDS to another region:
- Create a snapshot of the RDS instance.
- Copy the snapshot to the target region.
- Create a new RDS instance from the copied snapshot in the target region.
- Configure the new database instance.
- Test the new instance.
- Redirect traffic to the new database instance.

Author
Popular Articles


