As businesses generate massive amounts of data, decision-making has become more reliable. However, there’s the constant challenge of managing and analyzing the data to gain valuable insights. To handle a colossal amount of data, organizations often use cloud storage services like Amazon S3 and Redshift. Both storage systems play a crucial role in supporting your storage and analytics needs. But, understanding the ability to move data between S3 and Redshift is crucial for optimizing your analytics workflow.
In this comprehensive guide, we'll explore what Amazon S3 and Redshift are, and delve into three effective methods to load data from S3 to Redshift seamlessly.
What is Amazon S3?
Amazon S3 (Simple Storage Service) is a fully-managed cloud-based object storage service provided by Amazon Web Services (AWS). It offers a scalable platform for storing and retrieving unstructured, semi-structured, and structured data.
The data in Amazon S3 is stored as objects within buckets. Objects are the files and associated metadata that are stored in the containers called buckets. To store data in Amazon S3, you must first create a bucket, then specify a bucket name and AWS Region. After creating a bucket, you can upload your data to the bucket as objects. Each object in the bucket has a unique identifier—a key or key name.
By default, S3 buckets and objects are private, so you’ll have access only to the S3 resources you create. To grant permissions or manage access to your Amazon S3 resources, you can use bucket policies, S3 Access Points, Access Control Lists (ACLs), and AWS Identity and Access Management (IAM) policies.
Here are some key features of Amazon S3:
- Integration with other AWS Services: You can seamlessly integrate Amazon S3 with other AWS services, like Amazon Redshift, AWS Athena, and AWS Glue. This enables you to build powerful and scalable applications.
- Security: Amazon S3 automatically encrypts all objects uploaded to the buckets. It supports server-side encryption like Amazon S3-managed keys (SSE S3), AWS Key Management Service (KMS) keys (SSE-KMS), and customer-provided keys (SSE-C).
- Scalability: Amazon S3 is built to handle virtually unlimited storage requirements. However, individual objects can range in size from 0 bytes up to 5 TB.
- Versioning: S3 supports versioning, enabling you to maintain multiple object versions in a bucket. This is particularly useful to restore objects upon accidental deletion or overwriting.
What is Redshift?
Amazon Redshift is a fully-managed, petabyte-scale cloud data warehouse solution by Amazon Web Services (AWS). You can use Redshift to store and query large volumes of analytical data efficiently.
An Amazon Redshift warehouse is a collection of computing resources called nodes, which are organized into a group called a cluster. Each cluster has a leader node and one or more compute nodes. The leader node receives queries from client applications, parses them, and develops query execution plans. Then, it coordinates the parallel execution of the plans with the compute nodes and aggregates the intermediate results. Compute nodes run query execution plans and transmit the data among themselves to serve these queries. The results of the queries are then returned to the client applications.
Here are some essential features of Amazon Redshift that you’ll find useful:
- Columnar Storage: The data in Redshift is stored in a columnar format. When compared to traditional row-based databases, a columnar format allows for faster query processing.
- Massive Parallel Processing (MPP) technology: Redshift uses MPP technology to distribute and process data across multiple nodes in a cluster.
- Scalability: Redshift allows you to scale your data warehousing needs without worrying about hardware or infrastructure management.
- Integration with Other AWS Services: You can easily integrate Redshift with other AWS tools like AWS Glue, Amazon Kinesis, and Amazon S3. This helps load data from different sources into Redshift for real-time or batch data processing, enabling you to obtain valuable insights.
- Data Encryption: Redshift uses encryption to secure your data at rest or in transit. For protecting data in transit, Redshift uses SSL or client-side encryption. And for data at rest, Amazon Redshift uses server-side encryption or client-side encryption.
Methods to Load Data from S3 to Redshift
Transferring data efficiently from S3 to Redshift is essential for effective data analysis and business intelligence. Here are three methods to accomplish this:
- Method #1: Using the
COPYcommand - Method #2: Using AWS Glue
- Method #3: Using SaaS alternatives like Estuary
Method #1: Using COPY Command to Load Data from S3 to Redshift
The COPY command is a powerful tool that allows you to efficiently load data from Amazon S3 into Amazon Redshift. It supports various data formats, including CSV, JSON, and Parquet.
Preparing for Data Loading
Before you begin, you'll need to complete a few preparatory steps:
- Create an S3 Bucket: Store your data files in an Amazon S3 bucket.
- Set Up Redshift Cluster: Ensure you have a Redshift cluster and the necessary schema in place.
- Format Your Data: Organize and format your data files correctly in the S3 bucket.
Steps to Load Data Using the COPY Command
- Prepare Your Data: Store your data files in an Amazon S3 bucket, ensuring they are correctly formatted.
- Create a Redshift Table: Define the schema and create the target table in your Redshift cluster.
- Configure IAM Roles: Set up AWS Identity and Access Management (IAM) roles with appropriate permissions for secure access to your S3 data.
- Execute the COPY Command: Run the COPY command, specifying the target table, data source (S3 bucket path), and necessary credentials or IAM role.
Example COPY Command Syntax:
plaintextCOPY table_name [column_list]
FROM 's3://bucket/path/file'
IAM_ROLE 'arn:aws:iam::account-id:role/role-name'
FORMAT AS JSON 'auto';
- table_name: The target table that must already exist in Redshift.
- column_list: Optionally specify the columns in the target table to map incoming data.
- data_source: The path to the data file in your S3 bucket.
- AWS access credentials: Necessary for authorization (can be provided through IAM roles).
After executing the COPY command, your data from S3 will be successfully loaded into Amazon Redshift.
Additional Tip: Using the UNLOAD Command
For scenarios where you need to store Redshift query results in S3, consider using the UNLOAD command. It operates similarly to the COPY command but in reverse. Learn more about using the UNLOAD command to optimize your data storage strategy.
Method #2: Using AWS Glue to Load S3 Data to Redshift
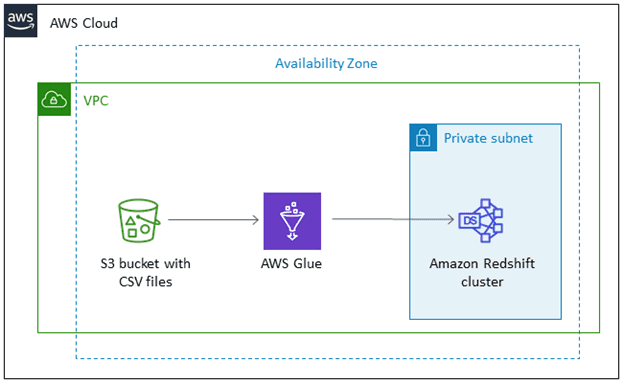
AWS Glue is a fully managed, serverless data integration service that makes it easy to discover, prepare, and combine data for analytics and machine learning. It can be used to create ETL (Extract, Transform, Load) jobs that move data from S3 to Redshift efficiently.
Steps to Load Data Using AWS Glue:
Step 1: Preparing for AWS Glue Integration
AWS Glue is a serverless, fully-managed data integration platform that simplifies the movement of data between Amazon services. You can use AWS Glue to connect to more than 70 diverse data sources, including S3. You can also create ETL jobs that extract data from S3, transform it, and load the transformed data into Redshift.
Step 2: Configuring IAM Role and Permissions
AWS Glue also uses COPY commands to copy data to Redshift. Before you use AWS Glue, ensure you have an Amazon S3 bucket containing the data you want to load to Redshift. You must create an IAM role by adding the resource in the IAMGlueServiceRole (IAMRole) and give it access to S3.
Step 3: Setting Up AWS Glue Crawler
After configuring the IAMRole, create a new crawler and provide the S3 bucket path. Attach the IAMRole to the target database, then set the output and scheduling.
Step 4: Configuring Target Database and Output
Create and run the crawler in AWS Glue Service. This will load your S3 data into Redshift.
Method #3: Using SaaS Alternatives Like Estuary to Copy from S3 to Redshift
While the COPY command and AWS Glue help load your S3 data into Redshift, there are some potential drawbacks associated with them. AWS Glue is batch-oriented, and you can schedule your data transfers at a minimum of 5-minute intervals when loading data into Redshift. If real-time data loading is crucial for your use case, these may not be the best choice. On the other hand, the COPY command only supports JSON, AVRO, and CSV data sources for data transfers.
To overcome the challenges associated with the other two methods, you can use third-party ETL tools like Estuary Flow. Flow offers integration capabilities for real-time data transfer. By using Flow’s built-in connectors, you can also connect to a wide range of data sources without writing a single line of code.
Here's the following steps to use Estuary Flow for loading data from S3 to Redshift:
Prerequisite: Set up Redshift to connect with Flow. Learn how here.
Step 1: Setup Estuary Account
Step 2: Source Data Capture Setup
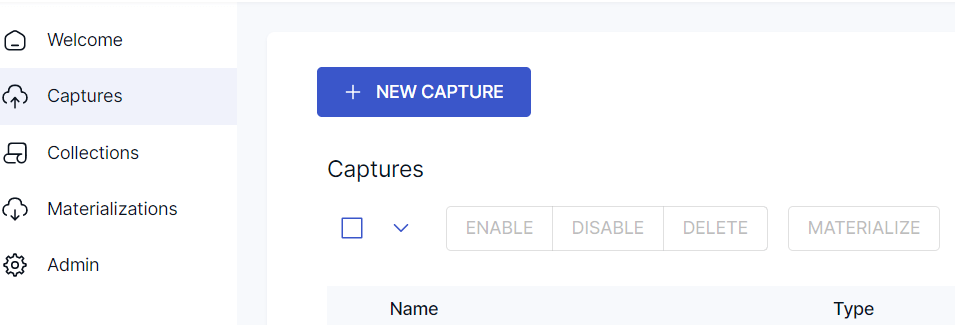
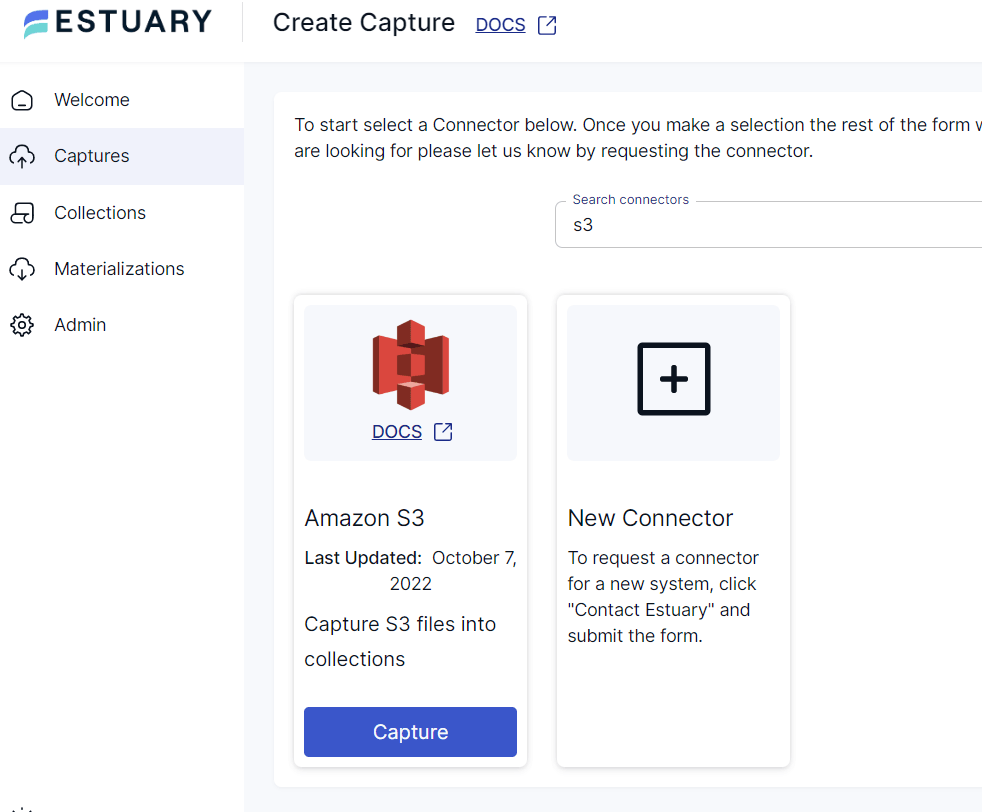
- Once you’ve logged in, locate the Captures option on the left side of the Estuary dashboard. On the Captures page, click on the New Capture button. This step is to set up the source end of the data pipeline.
- Search for S3 in Source Connectors.
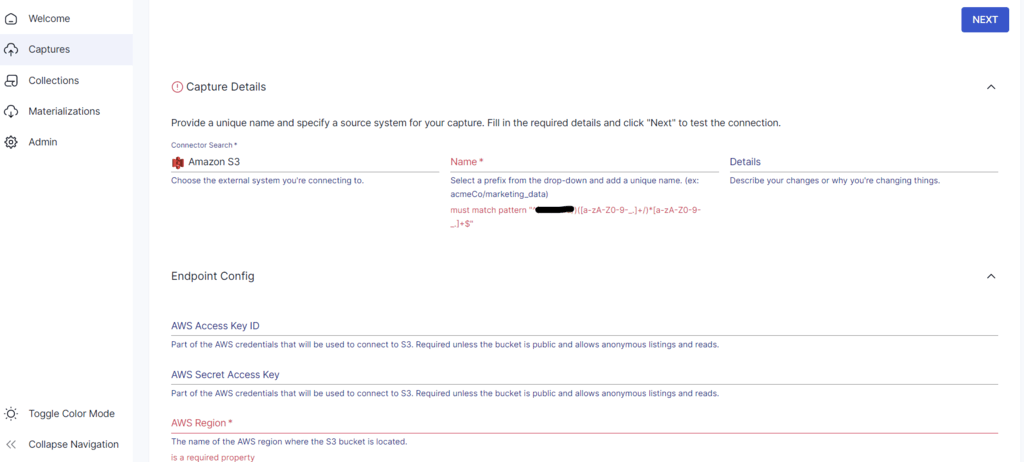
- Then, click on the Capture button. You’ll be directed to the S3 Capture connector page.
- Fill in all the required fields, then click on Next. Then click on Save and Publish. This will capture your data in S3 into a Flow collection.
Step 3: Destination Configuration
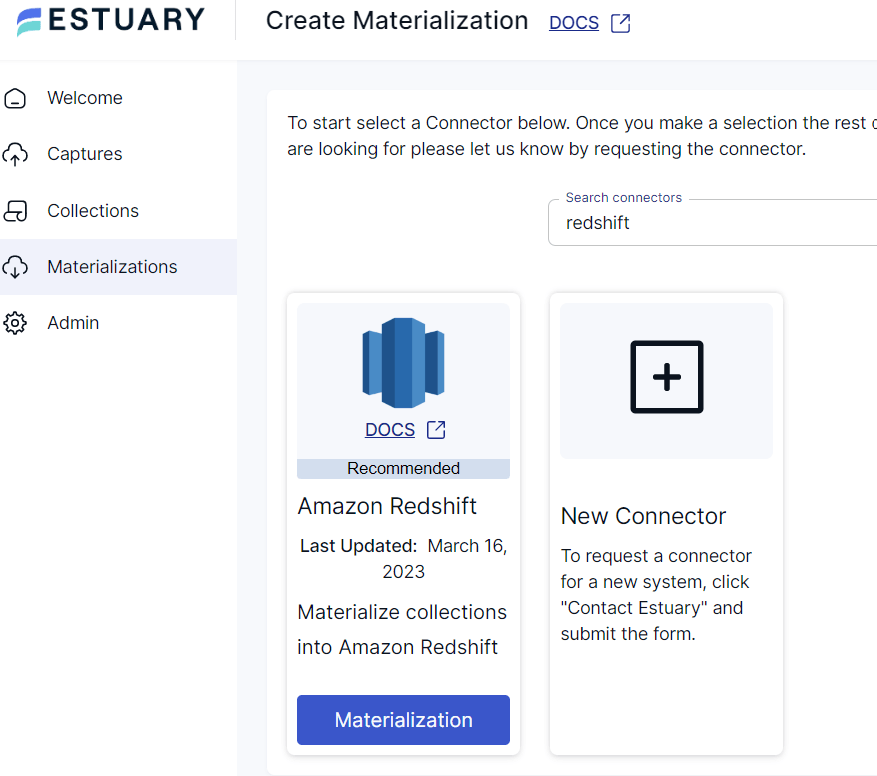
- The next step is to set up the destination end of the pipeline. In this case, it’s Amazon Redshift. Click on Materializations on the left side of the Estuary dashboard. On the Materializations page, click on New Materialization.
- Search for Amazon Redshift in Search Connectors, then click on the Materialization button.
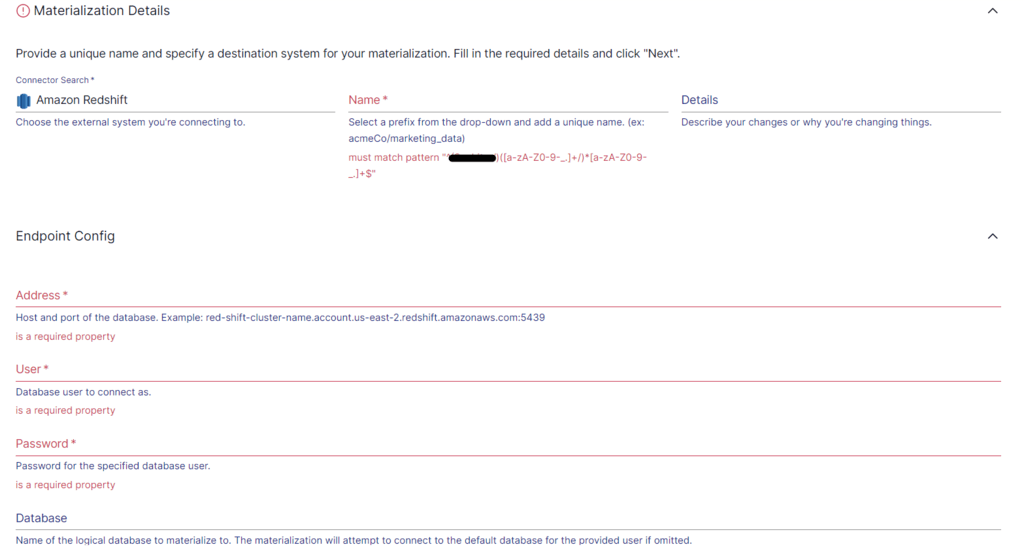
- You’ll be redirected to the Redshift connector page, where you must fill in the required fields like Address, database user name, and Password. You will also have to provide the details of Amazon S3 buckets, along with the access and secret access key for read/write permission.
- Once you’ve filled in the required information, click on Next, then click on Save and Publish.
This will set up the automated data transfer process from S3 to Redshift. For more information on the process, here’s all the documentation to help out:
- How to Set Up a Data Pipeline like this one
- The Amazon S3 Source Connector
- The Amazon Redshift Materialization Connector
Conclusion
Efficiently moving data from S3 to Redshift is essential for leveraging the full potential of your data analytics and business intelligence initiatives. Depending on your specific requirements, resources, and expertise, you can choose between using the COPY command, AWS Glue, or a SaaS solution like Estuary Flow.
- The COPY command is ideal for straightforward, high-performance bulk data loading.
- AWS Glue offers a robust, serverless solution for complex ETL processes and transformations.
- Estuary Flow provides an easy-to-use, real-time data integration platform with minimal setup and management overhead.
By selecting the appropriate method and following best practices, you can ensure seamless and efficient data transfers, empowering your organization to derive actionable insights and drive informed decisions.
Ready to streamline your data workflow?
Estuary Flow supports seamless integration for efficient data transfers between a range of source and destination data platforms. Get started with Estuary Flow today; your first pipeline is free!
FAQs
- Can I load real-time data from S3 to Redshift?
Yes, using SaaS solutions like Estuary, you can set up real-time data pipelines to load data continuously from S3 to Redshift.
- Can I load data from multiple S3 buckets into a single Redshift table?
The COPY command supports various data formats including CSV, JSON, Parquet, and more.
- How do I create a table in Redshift from a S3 bucket?
First, upload your data to an S3 bucket. Then, create a table in Redshift using the CREATE TABLE command. Finally, use the COPY command to load data from S3 into your Redshift table. For example:
plaintextCREATE TABLE my_table (column1 data_type, column2 data_type, ...);

COPY my_table
FROM 's3://bucket_name/file_path'
IAM_ROLE 'arn:aws:iam::account-id:role/role-name'
FORMAT AS JSON 'auto';

Author
Popular Articles


