As businesses continue to collect and analyze large amounts of data, SQL Server databases struggle to handle analytical queries, resulting in slow and inefficient processing. If you're facing this issue, or if you're simply looking to migrate data from MS SQL Server to Amazon Redshift, you're taking a wise step in improving your data processing capabilities.
Migrating data from SQL Server to Redshift is a challenging process that requires careful planning and execution to ensure a smooth transition. Redshift's cloud-based data warehousing solution offers scalable and fast data processing, making it an excellent choice for businesses that need to handle large volumes of data.
This comprehensive guide aims to provide businesses with a step-by-step and straightforward solution to migrate data from SQL Server to Redshift quickly and securely. Before diving into the tutorial, let's first define the two systems.
What is SQL Server?
SQL Server is a popular relational database management system (RDBMS) developed by Microsoft. It is used by businesses and organizations to store and manage large amounts of data in a structured manner. SQL Server is designed to handle a wide range of transactional and analytical workloads. It also supports various programming languages, including SQL, T-SQL, and ANSI SQL, and is compatible with various operating systems, including Windows, Linux, and macOS.
The Microsoft SQL Server has several key components that work together to store, manage, and process data.
- Database Engine: handles data storage, fast exchange processing, and data security.
- SQL Server Service: starts, pauses, stops, and continues the dataset process.
- Server Agent: acts as the task scheduler and can be set off by any event or request.
- SQL Server Browser: receives incoming queries and connects with the appropriate SQL server instance.
- SQL Server Full-Text Search: allows the user to run a full-text search against character data in SQL Tables.
Some of the main limitations of SQL Server include:
- May not be the best option for very large-scale enterprise applications or big data workloads.
- Can be complex to set up and manage, requiring specialized expertise and resources.
- Its proprietary nature can lead to vendor lock-in, limiting flexibility and interoperability with other systems.
What is Amazon Redshift?
Amazon Redshift is a cloud-based data warehousing service provided by Amazon Web Services (AWS). It is designed to handle data warehousing and analytical workloads. Redshift is a fully managed service that uses a columnar storage approach for faster data retrieval and compression. This reduces the storage requirements and costs.
Redshift is also highly scalable and can handle data warehouses of various sizes, from a few hundred gigabytes to petabytes of data. It also integrates with other AWS services, such as S3 for data ingestion and Kinesis for real-time data streaming.
Some of the key features of Redshift include:
- Auto-scale query capacity to handle workload changes.
- Integrates with other AWS services for a complete solution.
- High availability and disaster recovery features.
- Secure data exchange with AWS partners.
- Improved web-based query editor with advanced features.
- End-to-end encryption and other security features to protect data.
Methods to Migrate SQL Server to Redshift
Migrating data from SQL Server to Redshift is a crucial step for businesses that want to take advantage of cloud-based data warehousing. Fortunately, there are multiple ways to migrate SQL Server to Redshift, each with its own set of advantages and disadvantages. In this guide, we will focus on the most popular and easy methods to migrate your data from SQL Server to Redshift.
Method 1: Using the AWS Database Migration Service (DMS)
Method 2: Using custom ETL scripting
Method 3: Using SaaS Alternatives
Method 1: Using the AWS Database Migration Service (DMS)
AWS Database Migration Service (DMS) is a fully managed service that enables you to migrate data from one database to another. You can use DMS to migrate data from SQL Server to Redshift quickly and efficiently.
If you're interested in setting up real-time data replication for SQL Server CDC (Change Data Capture) in the context of this migration, you can learn more about it in our dedicated guide: SQL Server CDC.
Here's an overview of the process of migrating data from SQL Server to Redshift using AWS Database Migration Service:
Set up an AWS DMS replication instance: First, you need to create a replication instance within AWS DMS. A replication instance is a server instance that acts as a communication channel between SQL Server and Redshift. This replication instance is responsible for reading data from the SQL Server, applying any necessary transformations, and writing the data to the Redshift.
Create source and target endpoints: Once the replication instance is up and running, you'll need to create endpoints to connect to your SQL Server source database and Redshift target database.
Configure replication settings: AWS DMS provides a number of settings that allow you to fine-tune the replication process to meet your specific needs. You'll need to configure these settings to ensure that the migration process goes smoothly.
Start the replication process: Once everything is configured correctly, you can start the replication process. AWS DMS will begin copying data from your SQL Server source database to your Redshift target database.
Monitor the migration: During the migration process, it's important to monitor and ensure that everything is running smoothly. AWS DMS provides several tools to help you monitor the migration process, including cloud watch logs and metrics.
Verify the data: Once the migration is complete, verifying that all data was successfully migrated is important. You should perform a thorough test to ensure that everything is working as expected.
The process of migrating data from SQL Server to Redshift using AWS Database Migration Service (DMS) is relatively straightforward and can be completed in a matter of hours or days, depending on the size of your data set.
For detailed steps to migrating data using AWS Database Migration Service (DMS), please refer to the official AWS documentation.
Pros of using DMS:
- DMS is a fully managed service, so you don't need to worry about managing the infrastructure or software.
- DMS supports one-time and ongoing migrations to migrate your data to Redshift at your own pace.
- DMS can replicate data changes in real time, so you can keep your Redshift database up-to-date with your SQL Server database.
- DMS supports heterogeneous migrations so that you can migrate data from different database platforms to Redshift.
Cons of using DMS:
- DMS only supports a subset of SQL Server features. So some advanced features such as SQL Server Agent jobs, change data capture, FILESTREAM, and Full-Text Search are not supported.
- DMS can be complex to set up and configure, especially for complex migrations with many source and target endpoints.
Method 2: Using Custom ETL Scripting
In custom ETL scripting, you can fully control the code and customize it to meet your specific requirements. This allows you to fine-tune and optimize the migration process for your specific use case. You can add custom logic to handle complex data transformations and ensure that the data is migrated in the format that best suits your needs. This flexibility is one of the main advantages of custom ETL scripting for migrating data from SQL Server to Redshift.
Here's an overview of the process of migrating data from SQL Server to Redshift using custom ETL scripting:
Set up your environment: Before migrating data from SQL Server to Redshift using custom ETL scripting, you need to set up your environment. This involves installing and configuring the necessary software tools and libraries. You have to install the AWS command line interface (CLI) and Python, along with the required libraries, such as psycopg2 and boto3.
Extract data from SQL Server: Once your environment is set up, you can begin extracting data from SQL Server using your custom ETL script. Your ETL script should connect to the SQL Server database and extract the data you want to migrate into Redshift.
Transform data: After you have extracted data from SQL Server, you will need to transform it to prepare it for loading into Redshift. This may involve cleaning and reformatting the data and converting data types.
Load data into Redshift: Once the data has been extracted and transformed, you can load it into Redshift using the AWS CLI.
Pros of using custom ETL scripting:
- Custom ETL scripting offers complete control and flexibility over the migration process.
- ETL scripts can be customized to handle complex data transformations and business logic.
Cons of using custom ETL scripting:
- Custom ETL scripting requires technical expertise in scripting and database administration.
- Custom ETL scripting can be time-consuming and resource-intensive to set up and maintain.
- Custom ETL scripting requires more development effort compared to using pre-built solutions.
For detailed steps to migrating data using custom ETL scripting, check this out!
Method 3: Using SaaS Alternatives
Migrating data from SQL Server to Redshift using SaaS (Software-as-a-Service) alternatives involves using third-party data integration tools hosted in the cloud. These tools provide a user-friendly interface for configuring the migration process and allow you to migrate data without having to write complex code.
The process typically involves connecting to your SQL Server and Redshift instances using the tool's interface, selecting the tables or data sources you want to migrate, and specifying the desired data mapping and transformation rules. The tool will then handle the migration process and move the data to Redshift in an optimized format for querying and analysis.
Estuary Flow is one such data pipeline tool. It allows you to migrate data from SQL Server to Redshift in a web UI interface. Estuary Flow isn’t just limited to SQL Server and Redshift either. With a huge library of connectors to choose from, including databases and SaaS apps, you can create a wide variety of real-time pipelines.
Migrate with Estuary Flow
Estuary Flow is a powerful tool that simplifies the process of migrating data. Say goodbye to the hassle and stress of manual data migration. With Estuary Flow, you can enjoy a hassle-free, fully automated experience that ensures your data is safely and securely transferred between databases.
Steps to establish a data transfer process from SQL Server to Redshift.
- If you don't have one yet, start by setting up an Estuary account.
- Configure your SQL Server and Redshift instances to allow connections from Flow.
- Go to the dashboard.
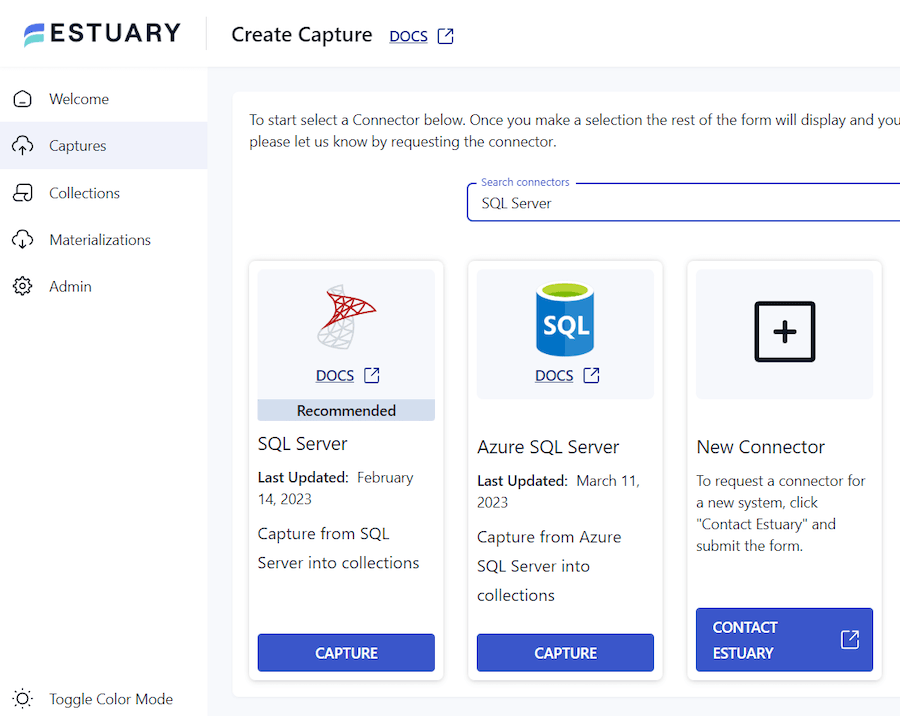
- Go to Capture > New Capture.
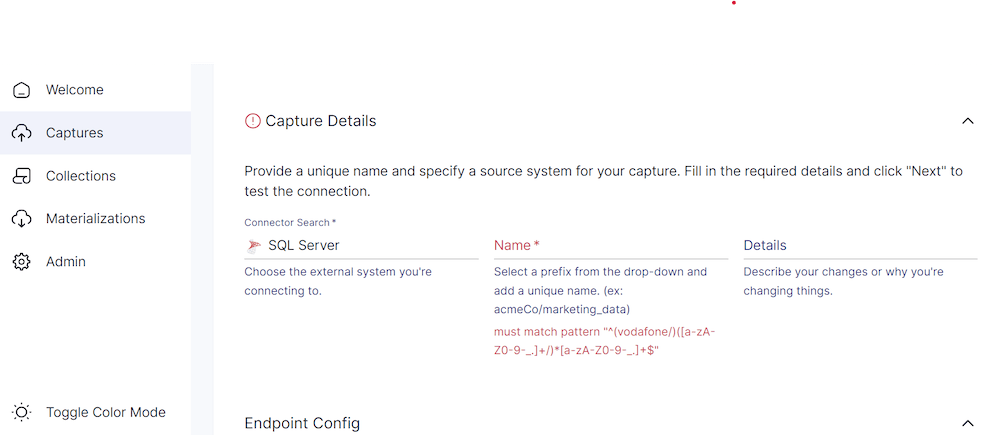
- Search SQL Server and click “Capture.”
- Provide a unique name.
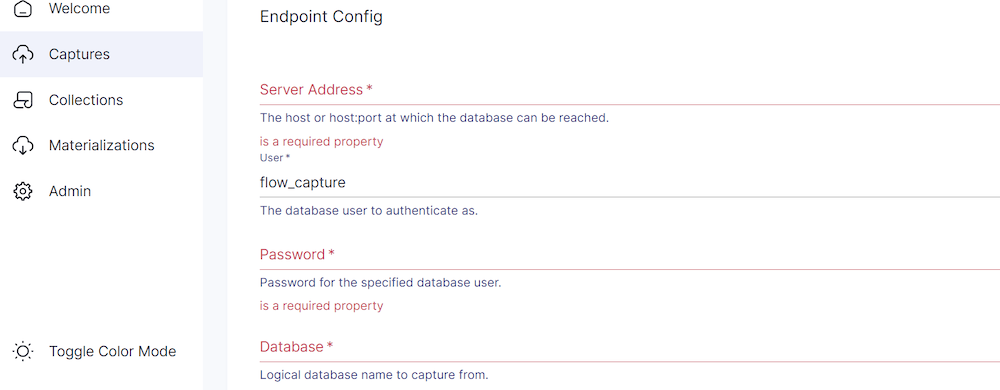
- Expand “Endpoint Config."
- Provide the server address.
- Enter the username and password of the database.
- Add the name of the database you want to capture and click “Next.”
- Click “Save and Publish”
Now, set up materialization to store the data in Redshift.
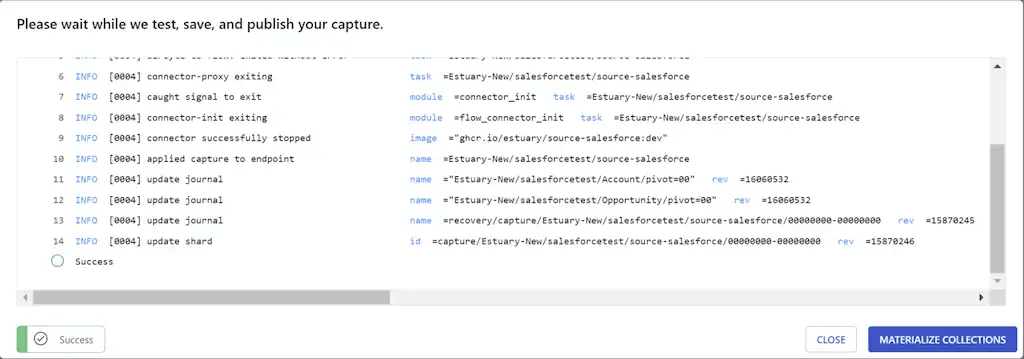
- From the successful capture dialog box, click "Materialize Collections."
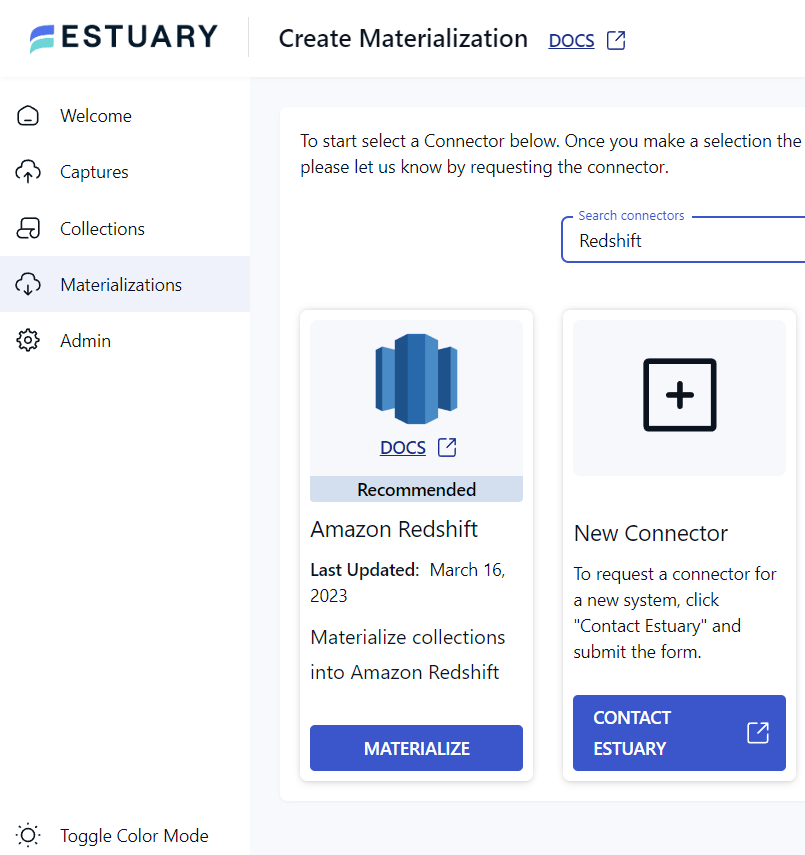
- Search and select “Redshift.”
- Click on “Materialize.”
- Provide a name and click on “Endpoint Config”.
- Enter the server address (host address).
- Provide your username and password.
- Click “Next.”
- Click “Save and Publish.”
- If you are presented with a successful confirmation screen, then your pipeline connection has been established, and congratulations are in order!
Pros of using SaaS Alternatives:
- SaaS alternatives typically have a user-friendly interface that simplifies the migration process.
- Since these services are cloud-based, you don't need to install any software or configure any servers.
- SaaS alternatives automate the migration process, saving time and reducing errors.
- These services can handle large data sets and can scale up or down as per your needs.
- Since the service provider manages the infrastructure and software, you don't need to worry about maintenance and upgrades.
Cons of using SaaS Alternatives:
- You may have limited control over the transformation process since you mostly use pre-built transformation logic. However, some SaaS alternatives, like Estuary, allow custom complex transformation workflows.
- You need to ensure that the service provider meets your security and compliance requirements.
What’s the Best Way to Move Data from SQL Server to Redshift?
The best method for moving data from SQL Server to Redshift depends on your specific use case and requirements.
If you have limited technical expertise and need a simple, fast, and reliable migration process, then the AWS Database Migration Service (DMS) is a great option. It is particularly suitable for users who are already using other AWS services.
If you have more complex data transformations to perform or need more control over the migration process, then custom ETL scripting is the way to go. This method is more suitable for users comfortable working with SQL and Python.
If you don't have the resources or expertise to build and manage your own data pipeline, then using a SaaS alternative is a good option. This method is particularly suitable for businesses of all sizes. However, if you don't have a large team of engineers or the time and resources to develop and manage your own data pipeline, SaaS alternatives are the best. One popular SaaS alternative for migrating data from SQL Server to Redshift is Estuary Flow.
Benefits of Using Estuary Flow for Data Migration
Easy user interface: Flow's web application is easy to use, making it quick to set up and manage the migration process, regardless of technical skill level.
Real-time data transfer: Estuary Flow performs a historical backfill of all data in your SQL Server database to Redshift. The pipeline then transitions to copying all new changes that appear in the SQL Server database, ensuring that the two sources of data remain in sync in real time.
Resilience against failure: Flow stores the data captured from SQL Server in cloud-backed data collections before writing them to Redshift, making it more resilient against any failure during the migration process. Give Estuary Flow a try!

Author
Popular Articles


